WindowsでGNUCobolのデバックを使うにはイントールできるソフトウェアが削除されていることもあり、無理でしたのでUbuntuでインストールしていきます。
今回は、WSLではsystemdがPID1で動いていないためこれらを先に処理していきます。
WSL関連の処理
依存パッケージのインストール
Ubuntuを開き事前に以下のコマンドを入力しインストールします。
sudo apt install -y daemonize dbus gawk libc6 policykit-1 python3 python3-pip python3-psutil systemd systemd-containersudo apt update
sudo apt dist-upgrade使用するテキストエディタをVimに変更
以下のコマンドでVimをインストールします。
sudo apt install -y vimVimをデフォルトエディタにする
sudo update-alternatives --config editor以下のように番号を選択する画面が出力されますので3と入力してエンターを押します。
user@DESKTOP-SQ1FG7D:~$ sudo update-alternatives --config editor
There are 4 choices for the alternative editor (providing /usr/bin/editor).

  Selection    Path                Priority   Status
------------------------------------------------------------
* 0            /bin/nano            40        auto mode
  1            /bin/ed             -100       manual mode
  2            /bin/nano            40        manual mode
  3            /usr/bin/vim.basic   30        manual mode
  4            /usr/bin/vim.tiny    15        manual mode

Press  to keep the current choice[*], or type selection number:3
確認のため 現在のデフォルトであるテキストエディタを表示します。
ls -lRa /etc/alternatives/editor以下のように「/usr/bin/vim.basic」と出力されていればOKです。
user@DESKTOP-SQ1FG7D:~$ ls -lRa /etc/alternatives/editor
lrwxrwxrwx 1 root root 18 Aug 27 11:20 /etc/alternatives/editor -> /usr/bin/vim.basic
wsl-トランスデビアンの事前確認
以下コマンドで対応の「lsb_release」 がインストールされていることをこちらのサイトで事前に確認してくたざさい。
rootユーザー sudo su として、以下のコマンドを入力します
apt install lsb-releasewsl-transdebian リポジトリの構成
rootユーザーsudo suとして、以下のコマンドを入力します。
wget -O /etc/apt/trusted.gpg.d/wsl-transdebian.gpg https://arkane-systems.github.io/wsl-transdebian/apt/wsl-transdebian.gpg

chmod a+r /etc/apt/trusted.gpg.d/wsl-transdebian.gpg

cat << EOF > /etc/apt/sources.list.d/wsl-transdebian.list
deb-src https://arkane-systems.github.io/wsl-transdebian/apt/ $(lsb_release -cs) main
EOF
続いて、リポジトリの更新後 rootユーザー から通常のユーザーにします。
apt update
exit
system-genie のインストール
参考サイト https://zenn.dev/fehde/articles/103560f2a7065f
sudo apt install -y systemd-genieGenieの設定
sudo cp /etc/genie.ini /etc/genie.ini.bak
sudo sed -i 's/systemd-timeout=240/systemd-timeout=30/g' /etc/genie.ini
sudo sed -i 's/update-hostname=true/update-hostname=false/g' /etc/genie.ini
sudo ssh-keygen -A
Genieの起動
genie -s以下のように出力されていればOKです。
user@DESKTOP-SQ1FG7D:~$ genie -s
genie: WARNING: systemd default target is default.target; targets other than multi-user.target may not work
genie: WARNING: if you wish to use a different target, this warning can be disabled in the config file
genie: WARNING: if you experience problems, please change the target to multi-user.target
Waiting for systemd....!!!!!!!!
user@DESKTOP-SQ1FG7D:~$
PID 1 の確認
PID 1 が systemd になっているか以下のコマンドを使って確認します。
ps -aux | head -n 2出力画面を見るとPIDが「systemd」になっていることが確認できましたね。
USER         PID %CPU %MEM    VSZ   RSS TTY      STAT START   TIME COMMAND
root           1  0.3  0.0 167456 12528 ?        Ss   07:29   0:00 systemd
user@DESKTOP-SQ1FG7D:~$
sytemd のデフォルトターゲットを変更
systemctl get-default
sudo systemctl set-default multi-user.target
sudo systemctl list-dependencies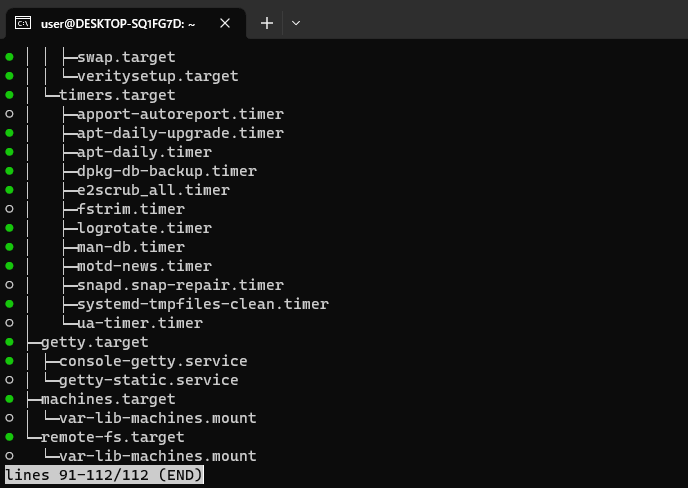
Vimエデッタを使用されている方は
ESC → :q エンターで通常のコマンドラインに移ります。
※一番下まで確認したい場合は下「↓」キーで移動できます。
sshのインストール
Ubuntu のデスクトップ版をインストールしたときにこのプログラムは含まれてないらしいのでインストールします。
sudo apt install openssh-server以下のコマンドで自動起動と起動処理をします。
sudo systemctl enable ssh
sudo systemctl start ssh
サービス動作状況確認を以下のコマンドでします。
sudo systemctl status ssh
動作確認がとれましたね
● ssh.service - OpenBSD Secure Shell server
     Loaded: loaded (/lib/systemd/system/ssh.service; enabled; vendor preset: enabled)
     Active: active (running) since Sun 2023-08-27 10:02:21 JST; 7min ago
       Docs: man:sshd(8)
             man:sshd_config(5)
   Main PID: 1076 (sshd)
      Tasks: 1 (limit: 30169)
     Memory: 1.7M
     CGroup: /system.slice/ssh.service
             └─1076 "sshd: /usr/sbin/sshd -D [listener] 0 of 10-100 startups"
補足となりますがアドレスを表示するは以下のコマンドを使います。
scurl ifconfig.me  #サーバと通信する時に使われるパブリックIPアドレスを表示
ip a          #IPv4とIPv6アドレスを表示
hostname -I      #IPv4アドレスを表示
対応していないサービスの無効化
sudo systemctl disable getty@tty1WSL 起動時に Genieを実行できる?
Microsoft公式ドキュメントにあるように、/etc/wsl.conf には以下が追加されていましたね
s[boot]
systemd=true
しかし、自動起動はやはり難しいようです。
.bashrc をvim ~/.bashrc コマンドで編集したりもしてみたのですが、システムを再起動すると、私の環境ではPID 1 が systemd でなくinitになっていたので、システムを起動する際、Genieをgenie -s コマンドを使って起動するしか今のところは解決策は見当たりまんでしたので、現在は以下のようにコメントアウトしています。
※環境によっては、有効な場合もあるかもしれませんので一応記載しておきます。
## Are we in the bottle?
#if [[ ! -v INSIDE_GENIE ]]; then
#  read -t 3 -p "yn? * Preparing to enter genie bottle (in 3s); abort? " yn
#  echo

#  if [[ \$yn != "y" ]]; then
#    echo "Starting genie:"
#    exec /usr/bin/genie -s
#  fi
#fi
GNUCobolのインストール
さて、いよいよGnucobolのインストールを以下のコマンドを使ってインストールしていきます。
sudo apt-get install gnucobol途中、Do you want to continue? [Y/n]と表示されたらyエンター
インストールが終わったら以下のコマンドで確認します。
cobc --version出力された画面からGnucobol3.1.2.0がインストールされていることが確認できました。
user@DESKTOP-SQ1FG7D:~$ cobc --version
cobc (GnuCOBOL) 3.1.2.0
Copyright (C) 2020 Free Software Foundation, Inc.
License GPLv3+: GNU GPL version 3 or later <https://gnu.org/licenses/gpl.html>
This is free software; see the source for copying conditions.  There is NO
warranty; not even for MERCHANTABILITY or FITNESS FOR A PARTICULAR PURPOSE.
Written by Keisuke Nishida, Roger While, Ron Norman, Simon Sobisch, Edward Hart
Built     Sep 14 2021 19:23:38
Packaged  Dec 23 2020 12:04:58 UTC
C version "11.2.0"
user@DESKTOP-SQ1FG7D:~$
GNU Debuggerのインストール
以下のコマンドでgdbのインストールをします。
sudo apt-get install gdb途中、Do you want to continue? [Y/n]と表示されたらyエンター
インストールが終わったら以下のコマンドで確認します。
gdb --versionバージョン12.1がインストールされているのが確認できました。
GNU gdb (Ubuntu 12.1-0ubuntu1~22.04) 12.1
Copyright (C) 2022 Free Software Foundation, Inc.
License GPLv3+: GNU GPL version 3 or later <http://gnu.org/licenses/gpl.html>
This is free software: you are free to change and redistribute it.
There is NO WARRANTY, to the extent permitted by law.
user@DESKTOP-SQ1FG7D:~$
今回はここまで・・
![]()
コメント